
Cowboy-dillo Wood Sculpture
- Woodworking
This project was motivated by wanting to try out wood carving, and I had a blast with it! I wanted to do some kind of animal carving as a gift and wanted to include a little something on top of it. Since I see armadillos as pretty Texan I thought that would be fun, and then I remembered how a store I loved had a large sculpture of a cowboy armadillo waving his hat. It seemed like a good homage since the place had closed within the last couple of years.
Most of the carving was done with a dremel using a variety of attachements. The early, rough shaping of material was done with a jigsaw and the rest could be glued together and sanded before carving.
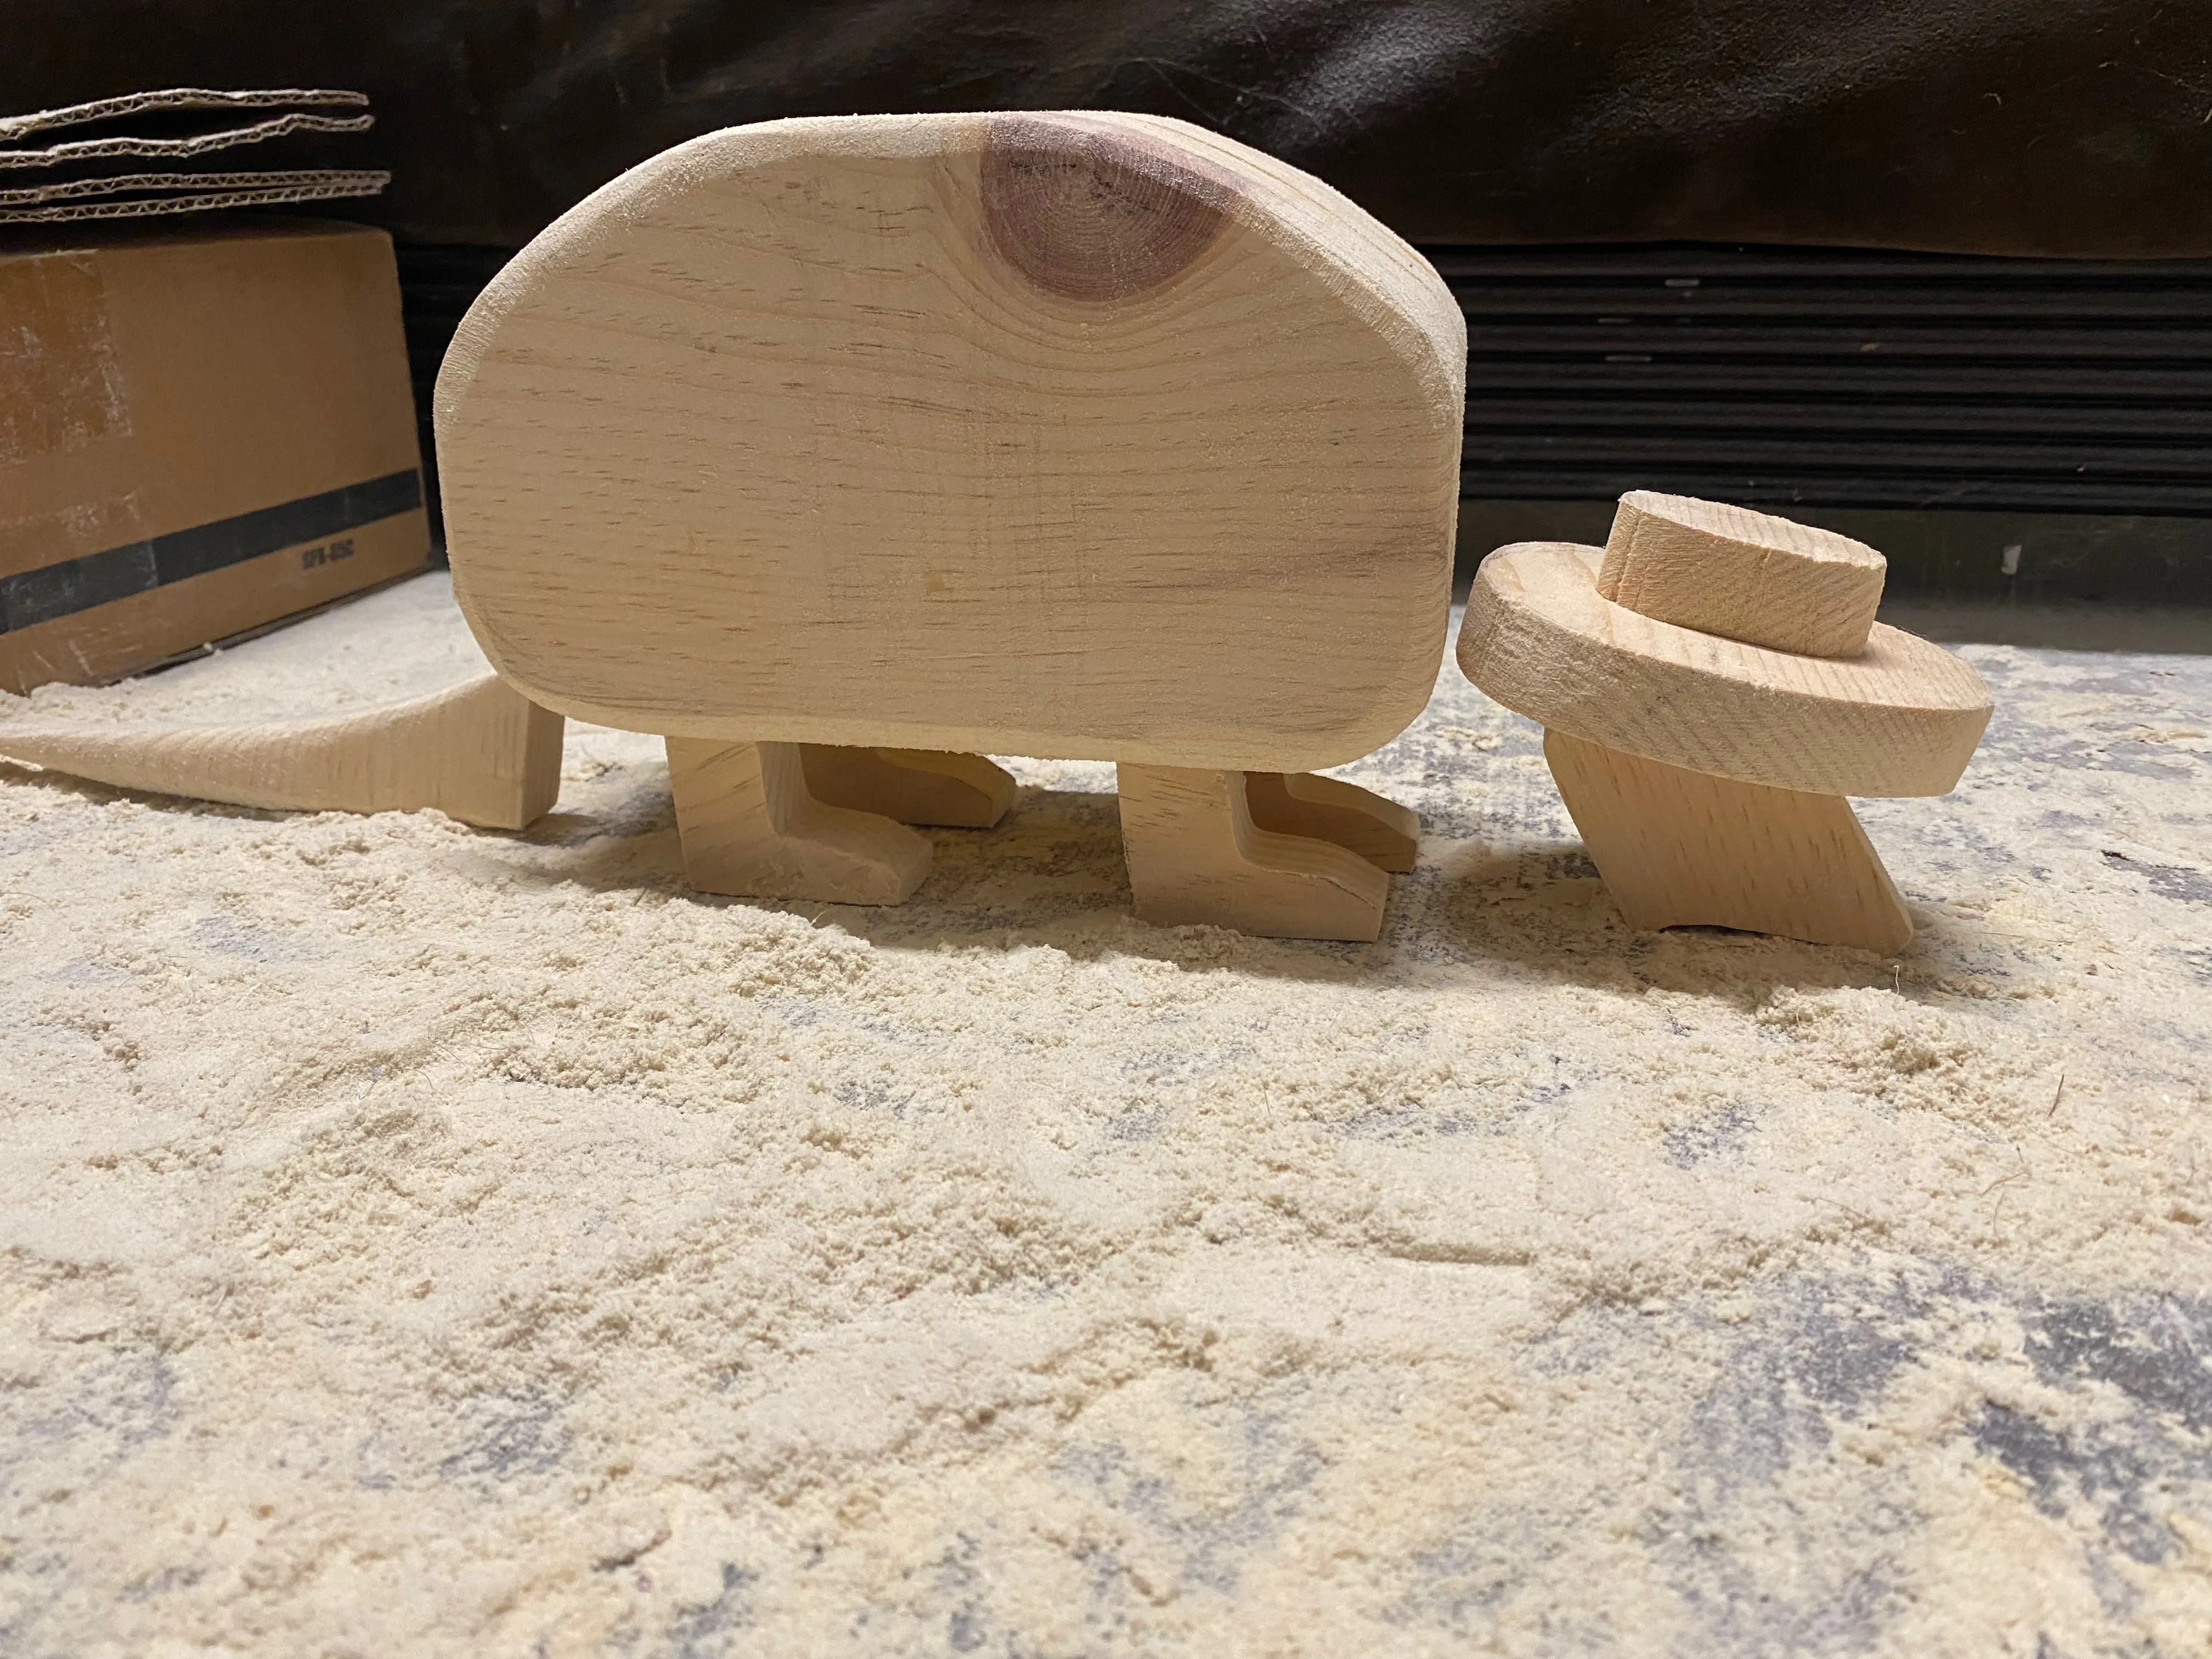
To start, I blocked out the different parts of the armadillo, which I planned to attach to the body with dowel pins so that they could be removed for safe travel/storage. This has the added vantage of being able to do some subtle posing of the head and feet, but both were limited to the single axis of rotation.
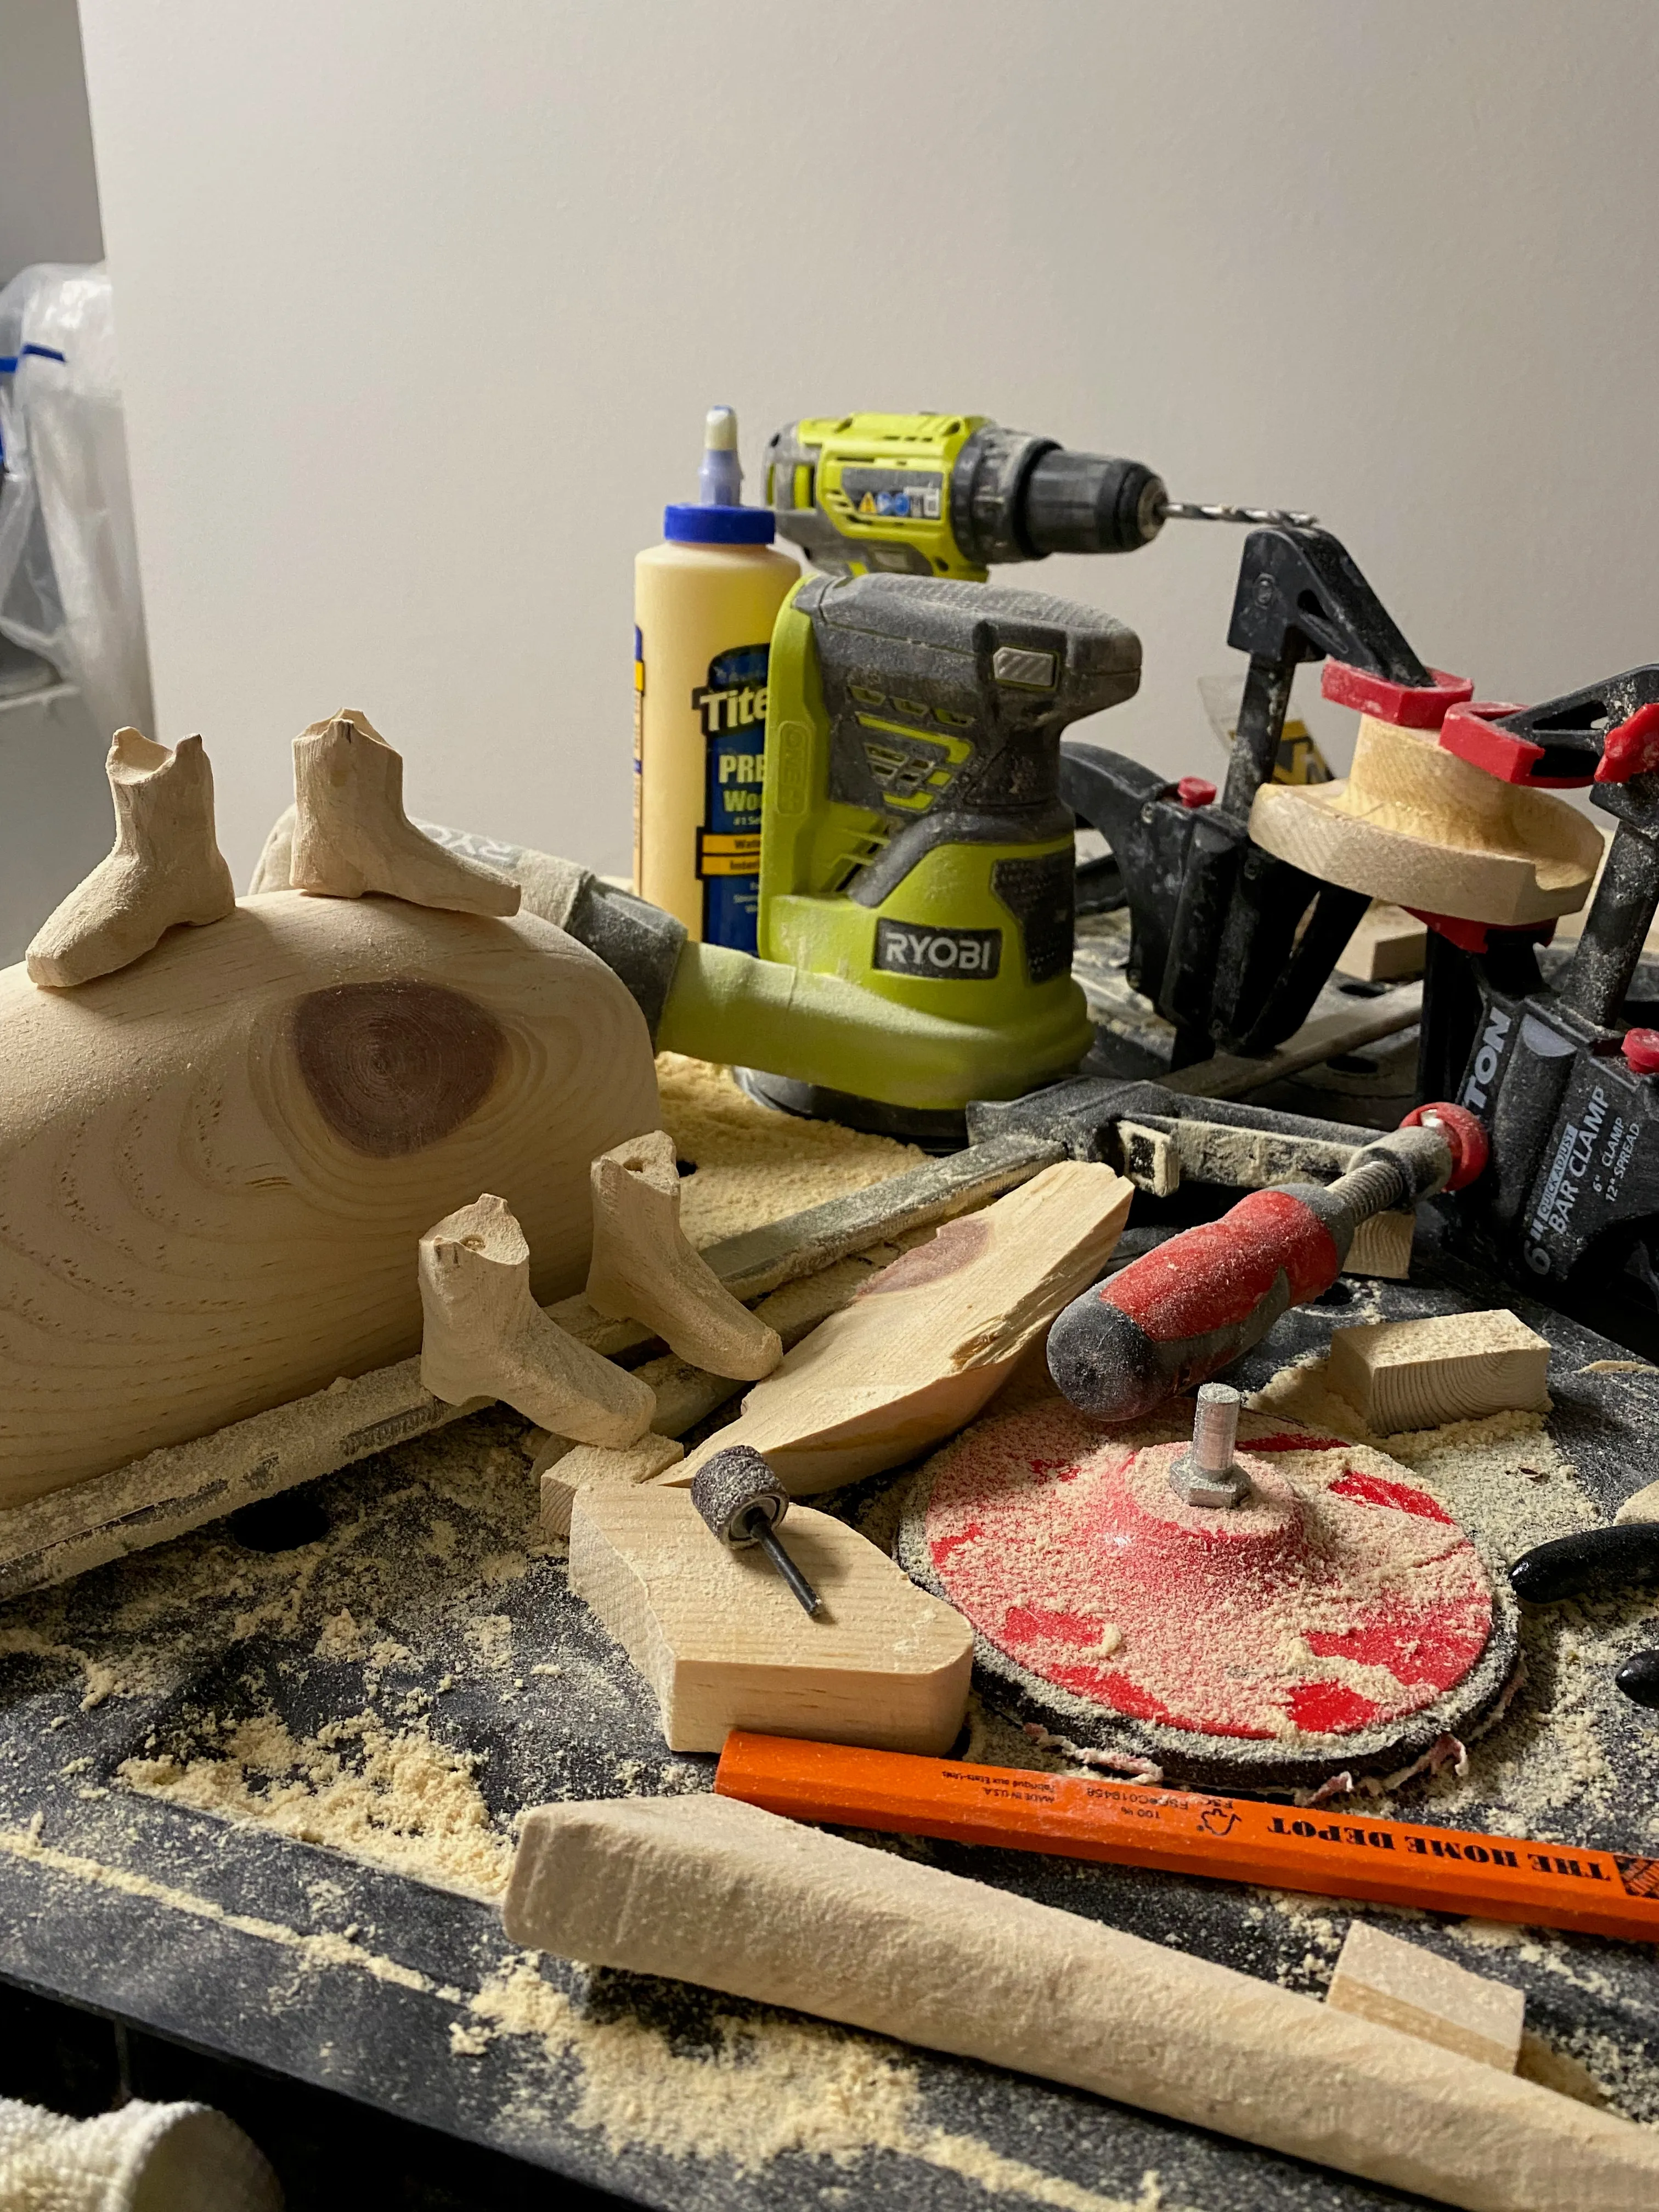
The cowboy boots and armadillo body after sanding, with a bit of shaping done on the hat and tail.
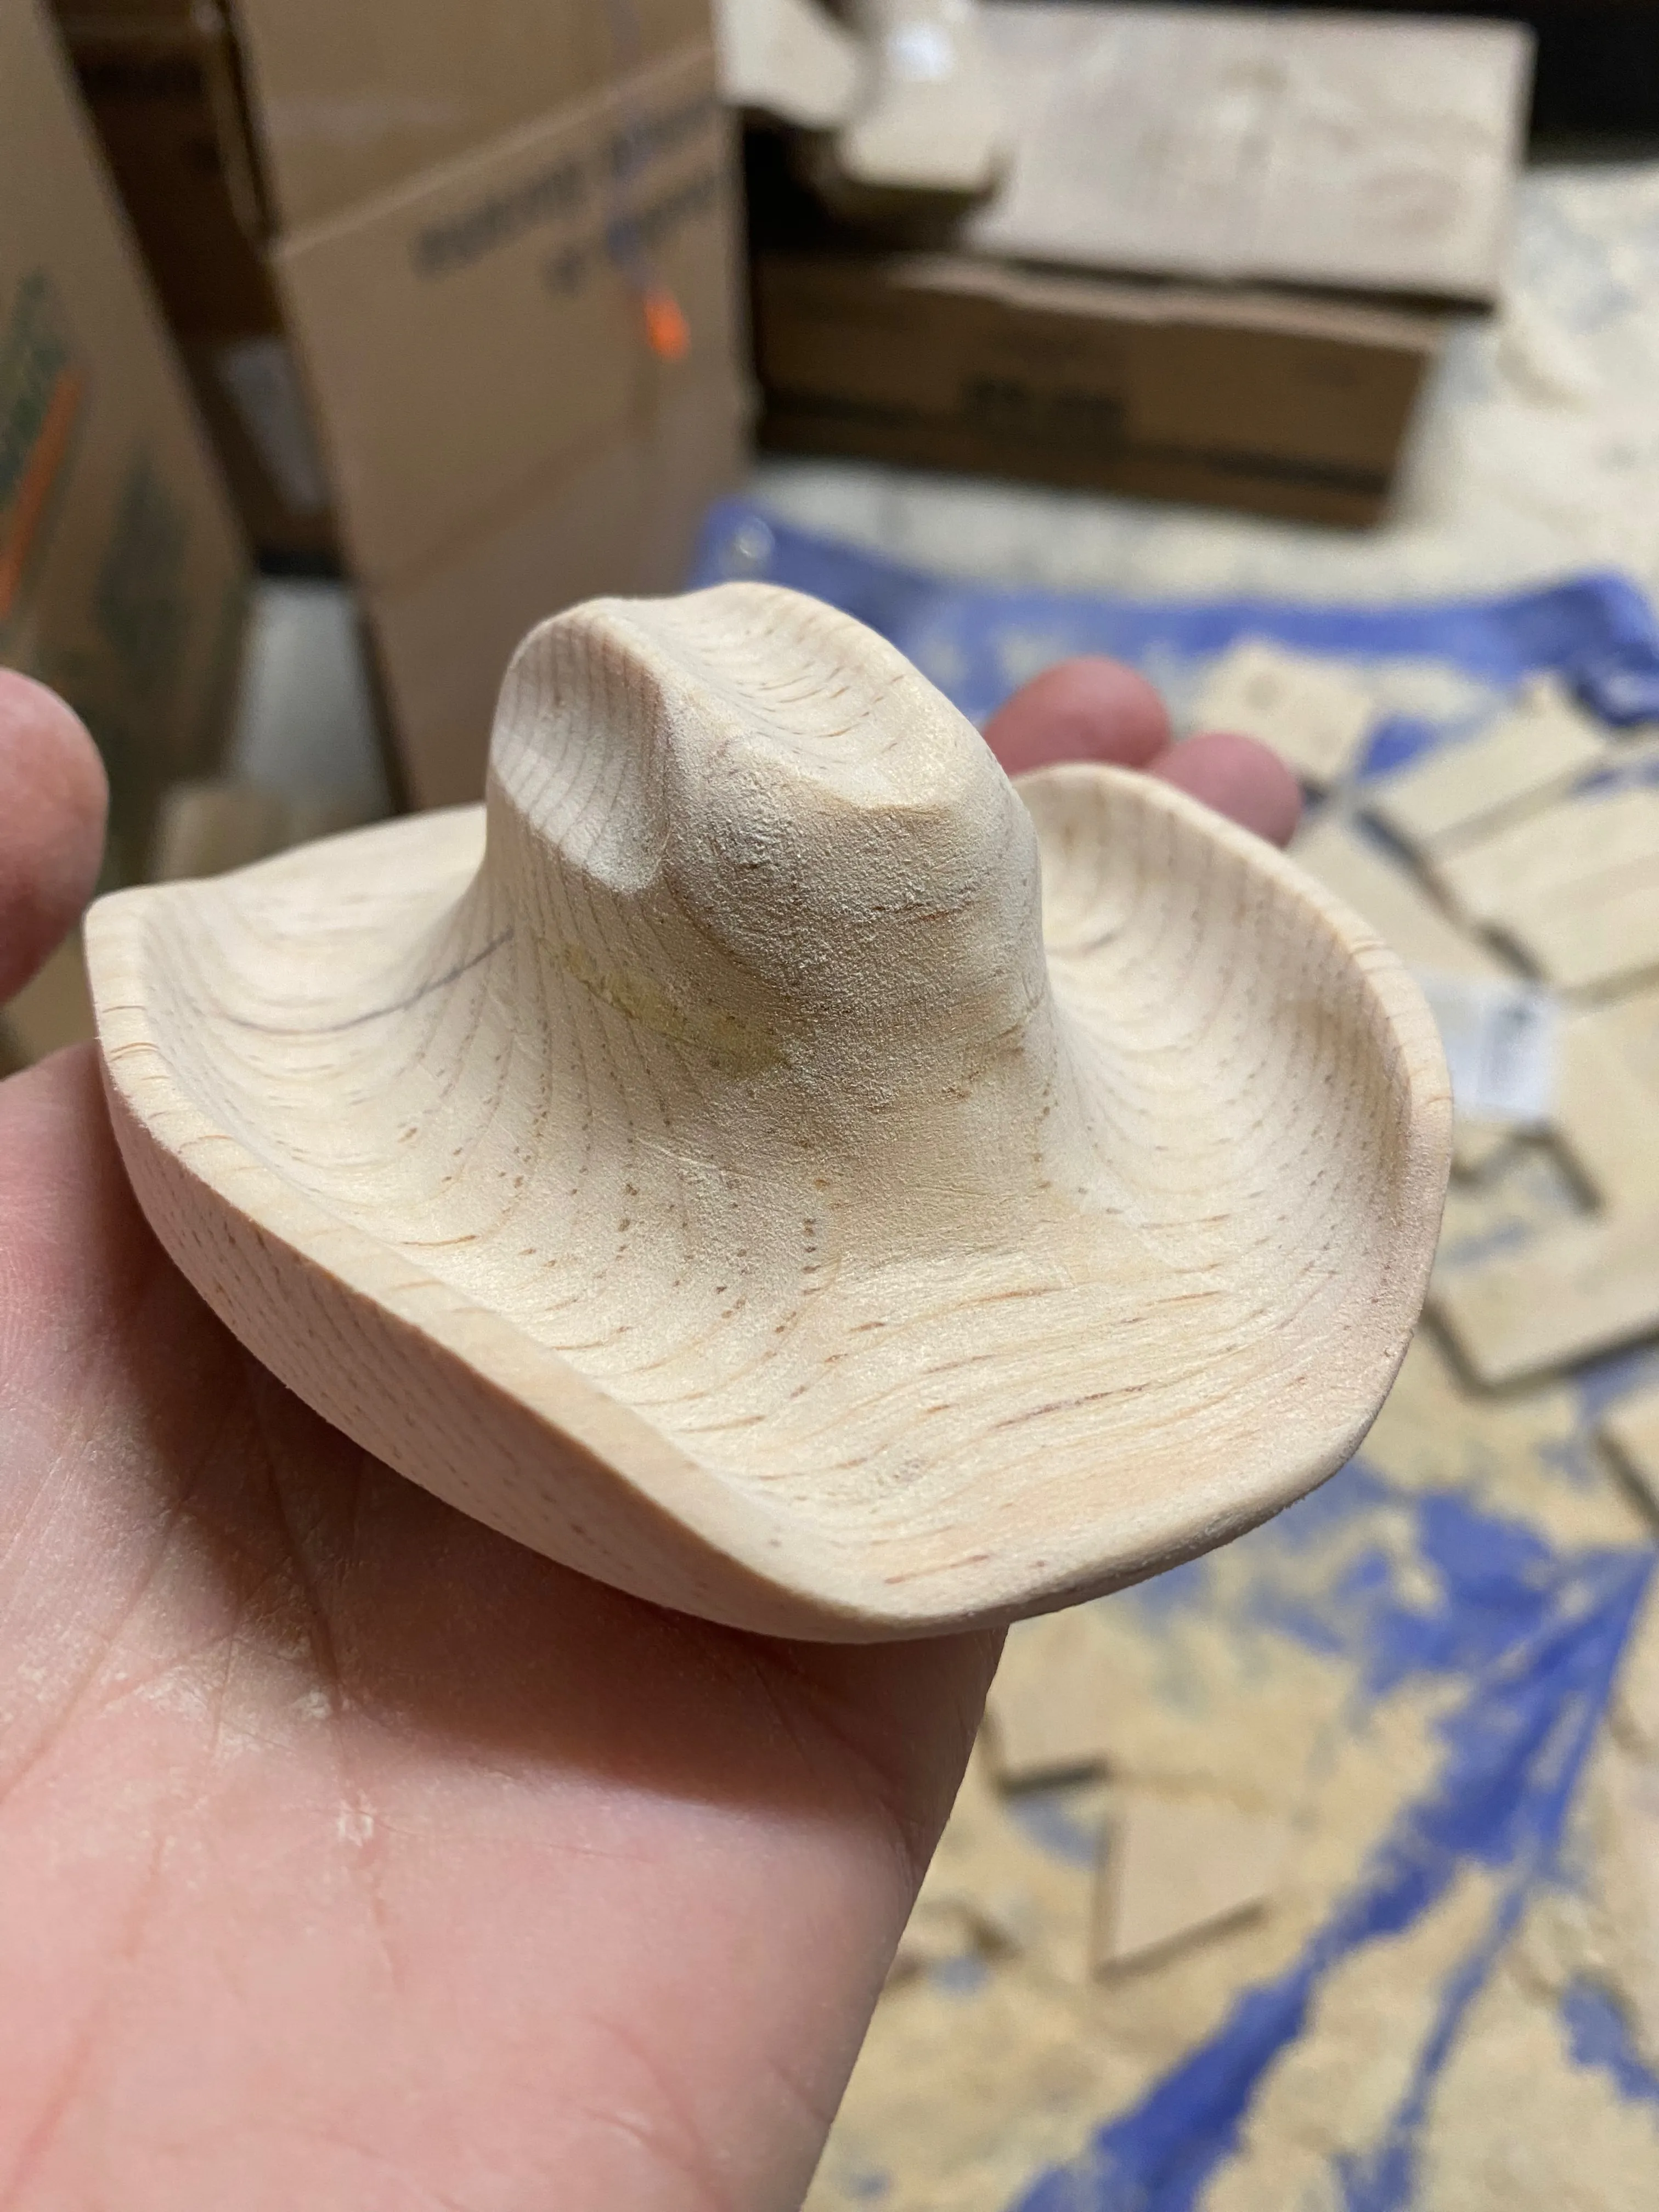
The hat is my favorite component of this project, I really came to appreciate its shape during the carving process. I also learned a little about the art of hat making and current styles, and this hat is based on the Stetson Shasta 10x.
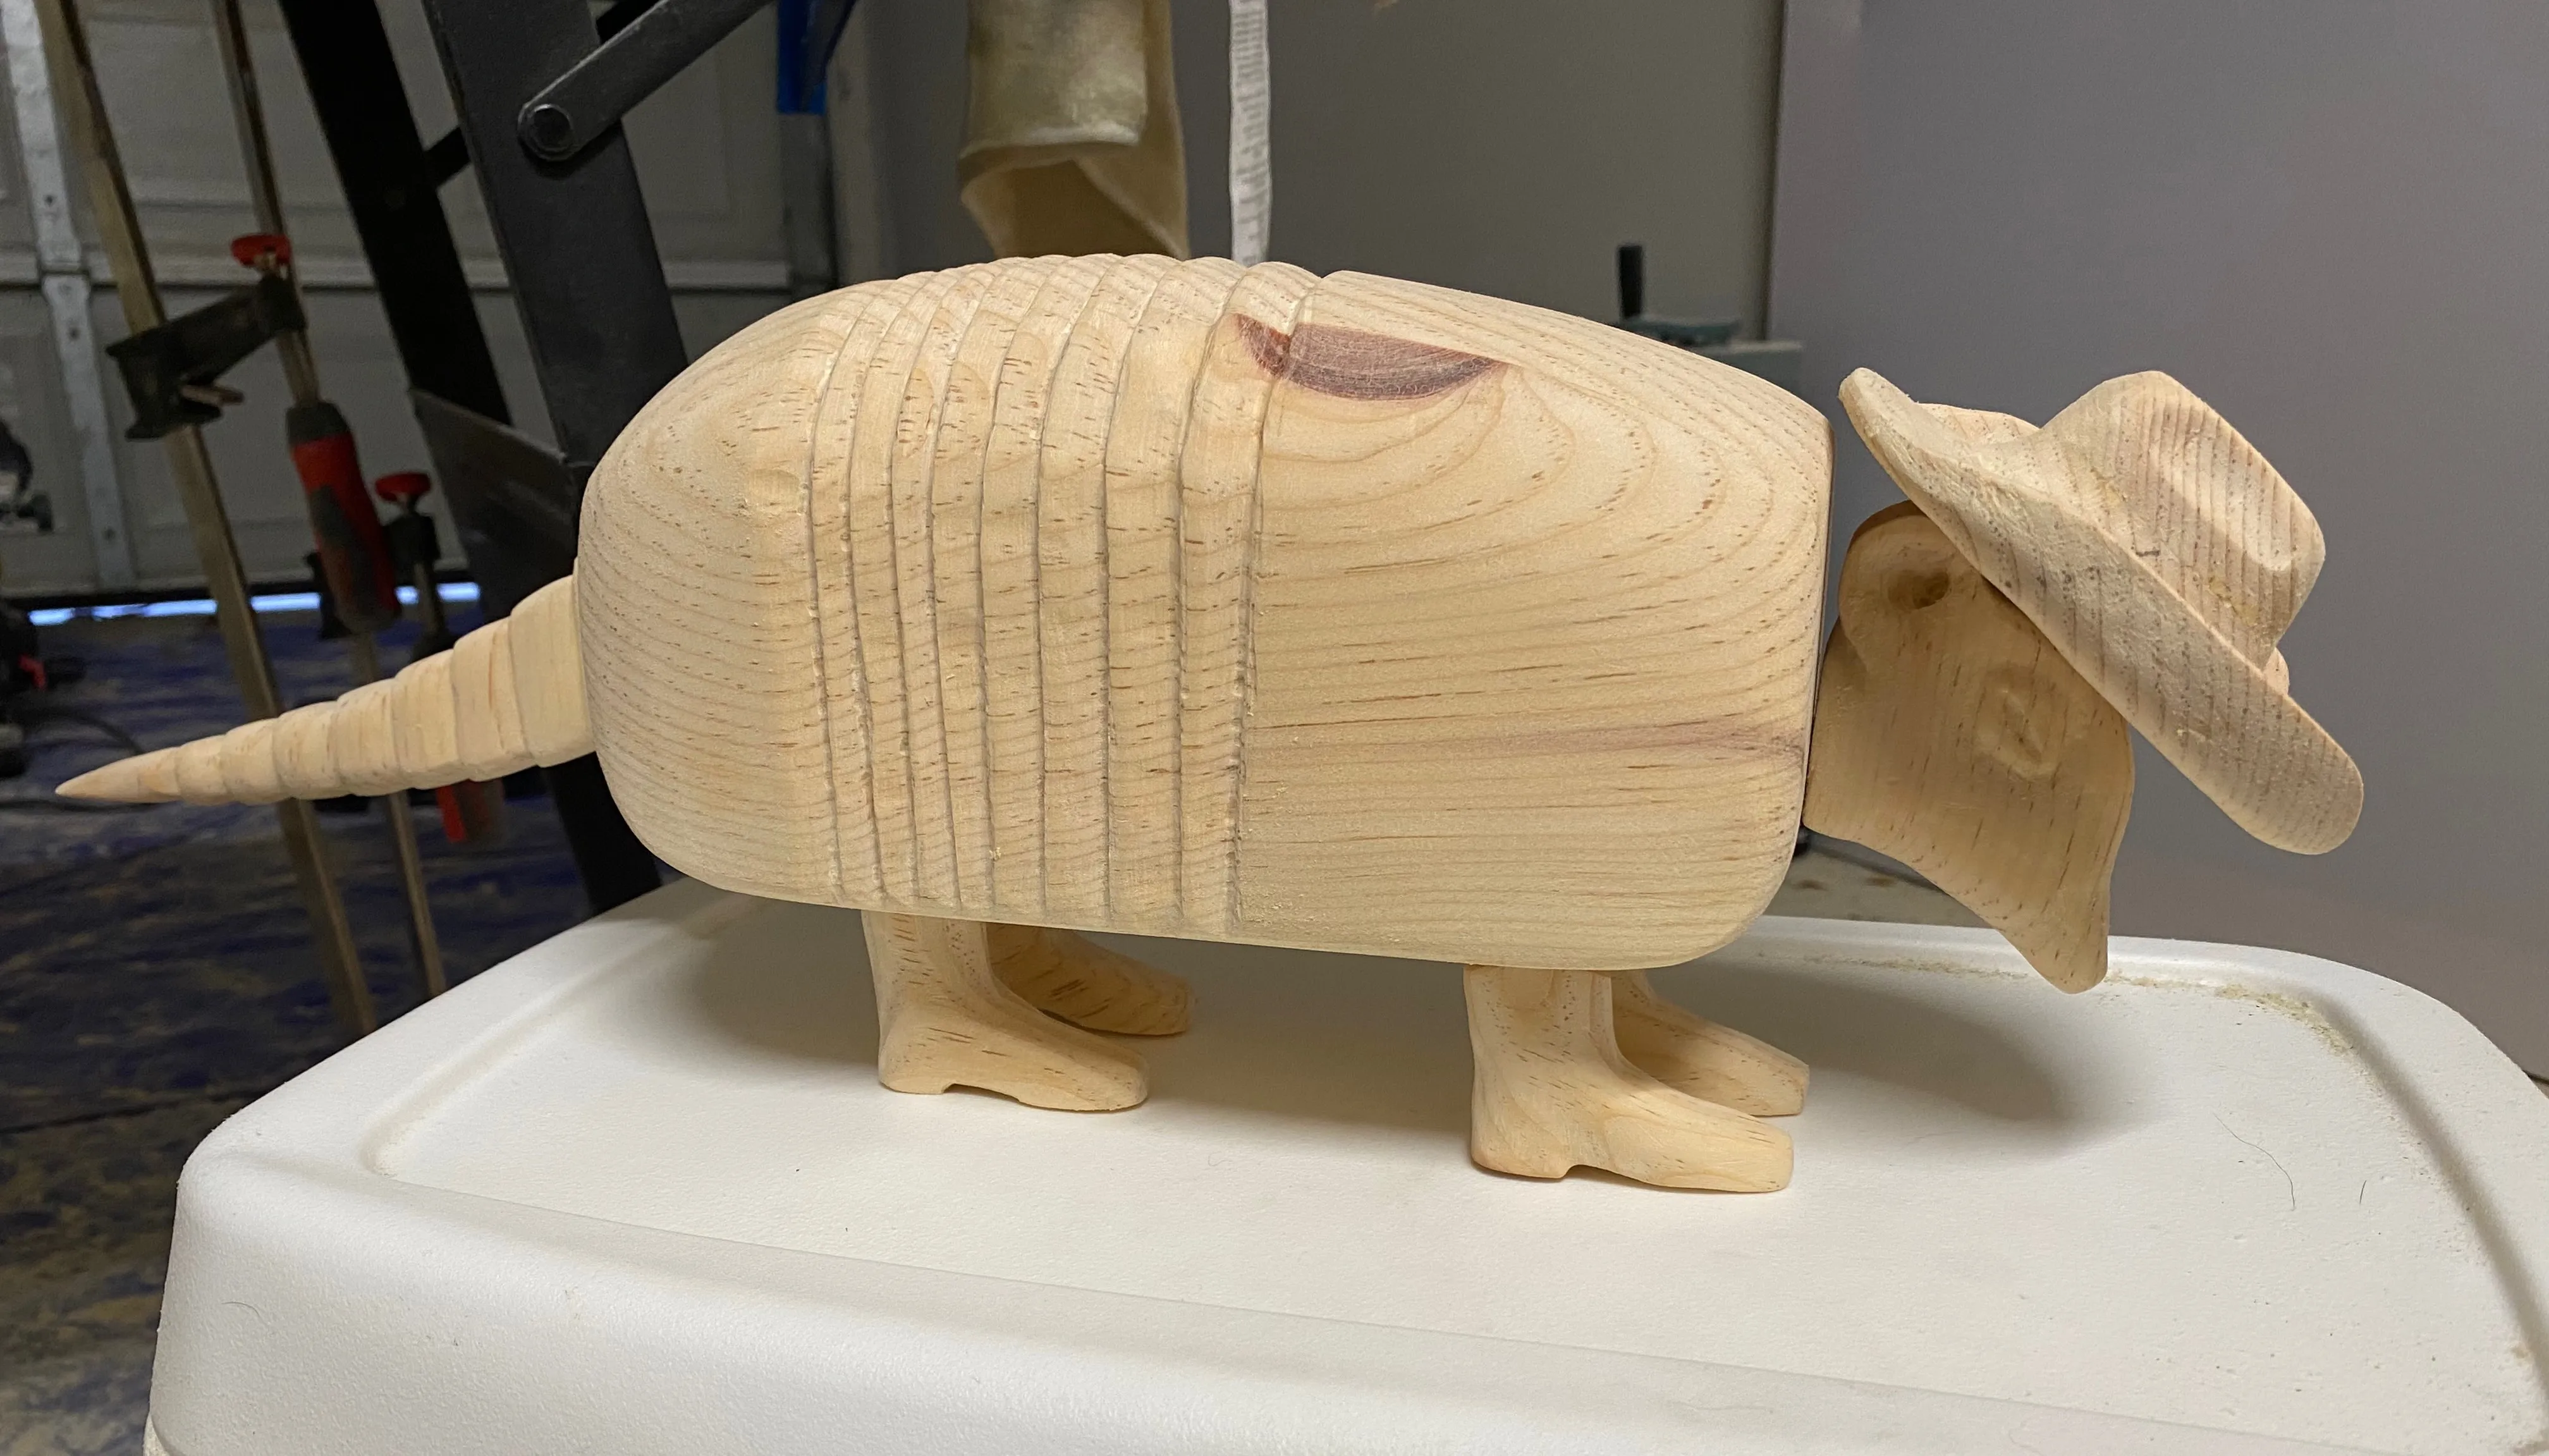
Here’s the final assembly! I tried to take care to make sure the bands reflected the 9-band armadillos we have in Texas, funnily enough I missed a band on my reference photo and thought the front half of the shell counted as the first band. So this is my 8-band cowboy, I think he needed to fashion a shield out of the 9th band in a particularly dodgy gunfight :)